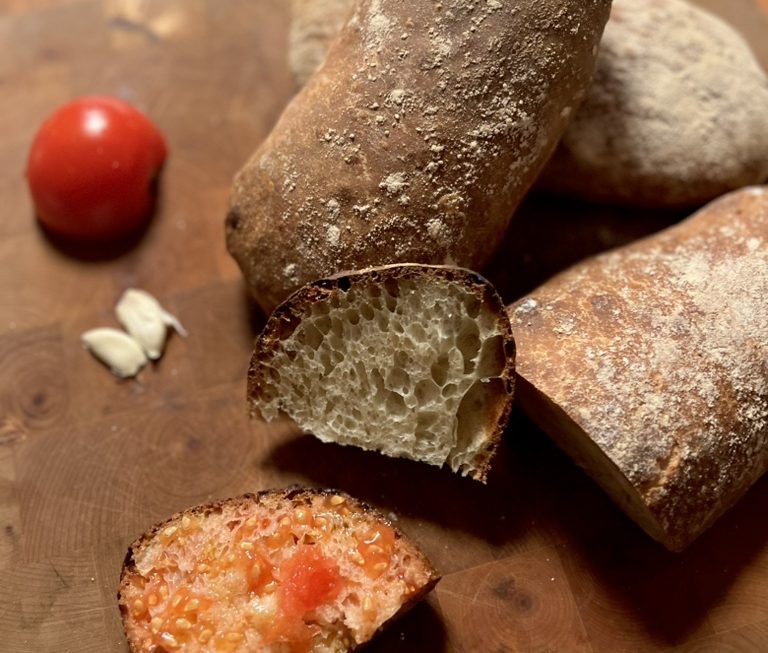
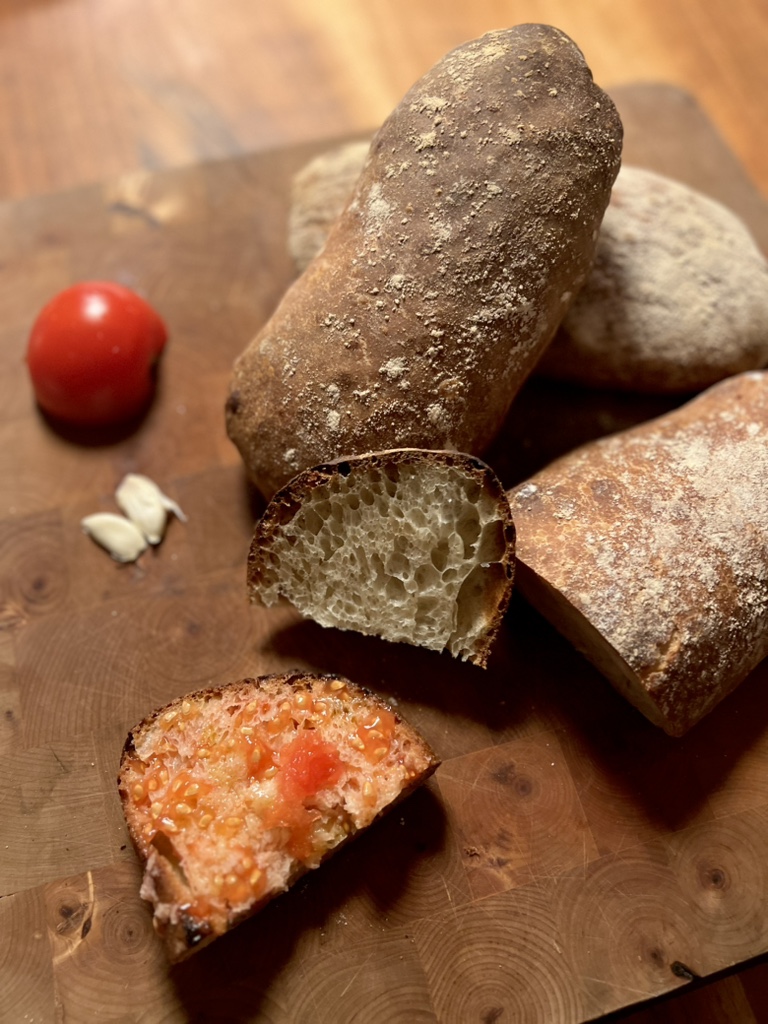
Spanish pan de cristal, which translates as “glass bread”, has an incredibly crispy, delicious crust and an airy, large-pored crumb. It is the perfect accompaniment not only to tapas, but also the ideal base for pa amb tomàquet, a roasted bread from Catalan cuisine rubbed with garlic and tomato.
The dough contains an extremely high proportion of water and therefore appears difficult to work with. However, with the right technique, this is not a problem and excellent results can also be achieved in an ordinary household oven. It takes around 5 hours from preparation to baking and just 30 minutes to bake.
The most important thing is the right flour. It must be very strong in order to hold all the water. In Germany and Switzerland you can use type 550, in Austria W 700, but you need to choose varieties that are labelled “very / extra strong”. Pannettone flour from Italy is suitable and internationally the name Manitoba is gaining popularity for these types of flour. It is crucial that the protein content is high, it should be more than 11 %.
If the dough later becomes very sticky and does not rise, then it is most likely due to the type of flour.
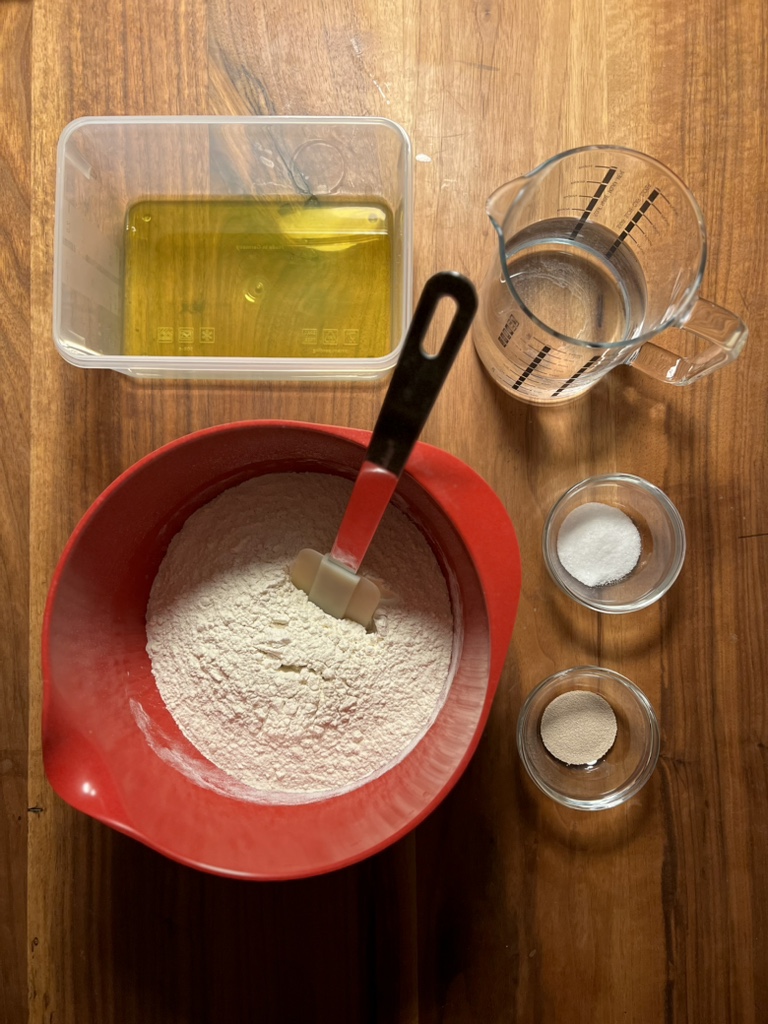
Otherwise, all you need is water, salt, dry yeast and a little olive oil. Important tools are a rectangular mould of about 24 x 18 cm and a dough card, which is in any case a very important utensil in the kitchen. You will also need baking paper.
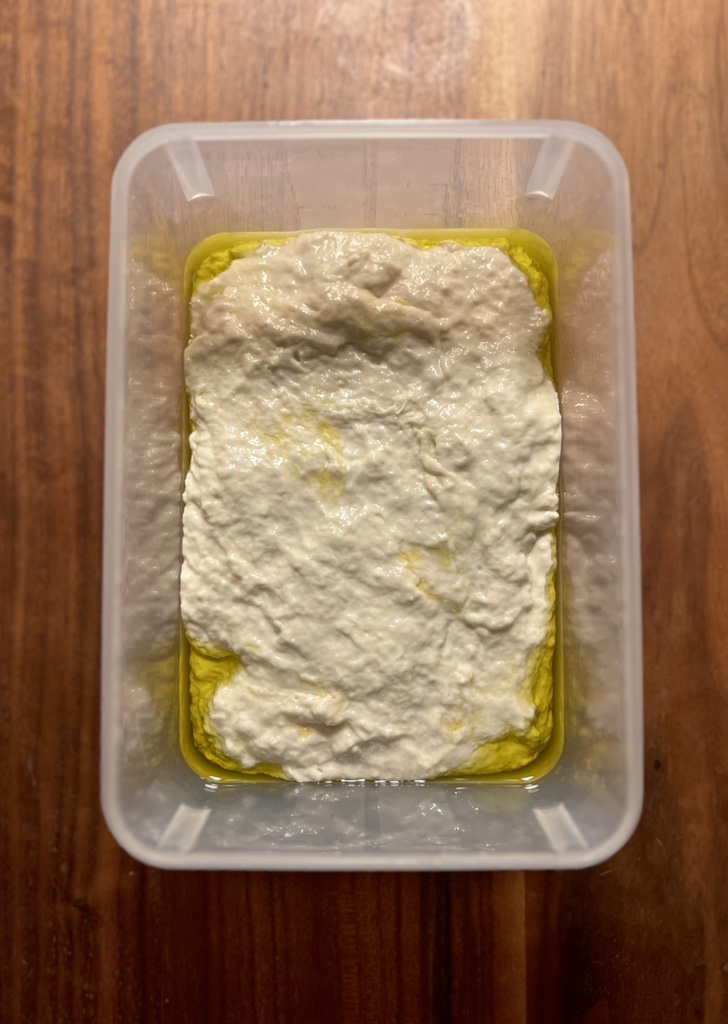
Flour, water, salt and yeast are mixed together to form a fairly liquid dough, which can be done quickly and easily by hand. The olive oil is also spread into the mould by hand and the dough is then poured in, which is best done with a silicone scraper. Then cover the mould and leave the dough to rest for 20 minutes at room temperature.
After this time, it is folded for the first time. Always do this with wet hands. Grab the dough from one side of the mould, pull it up a little and then fold it on top of each other. Do this two or three times from all sides before covering the dough again and leaving it to rest for 20 minutes.
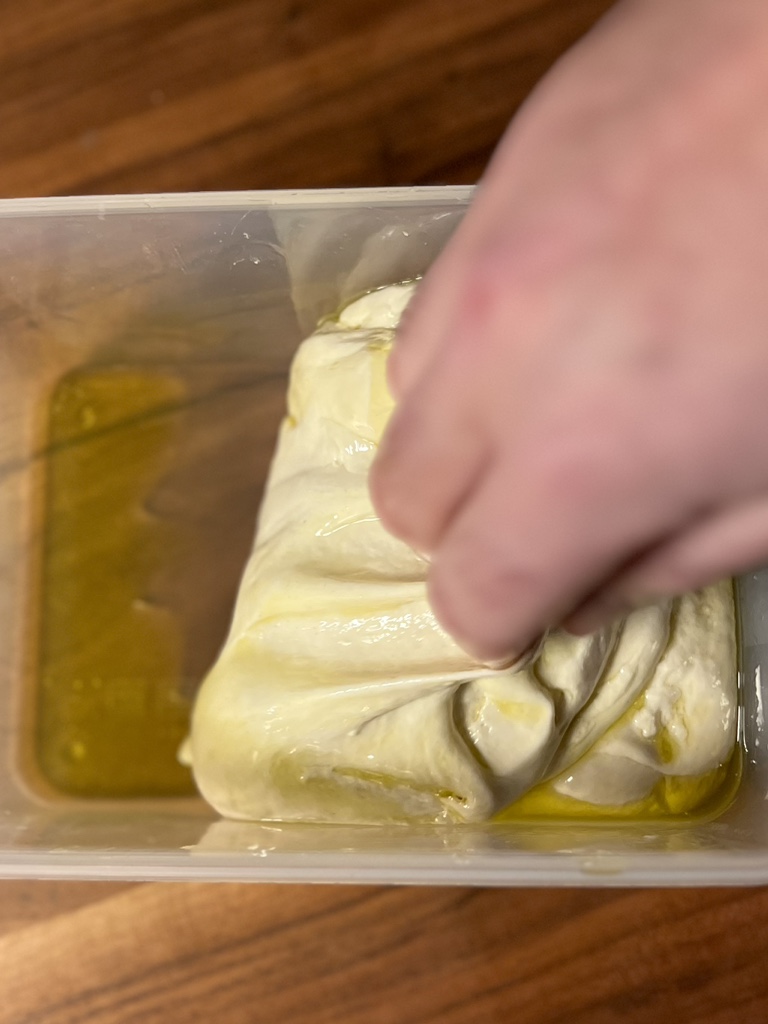
In the process, the olive oil is gradually worked into the dough, giving it a little more structure.
Then it’s time for the very important coil fold. We have already explained this principle here.
Grasp the dough from the side at about the centre with both (wet!) hands and lift it up, stretching it. Then fold the ends and the rest of the dough back over each other. You also do this several times, lengthways and crossways to the mould in which the dough is lying. You will see how much more elastic and smooth the dough becomes very quickly.
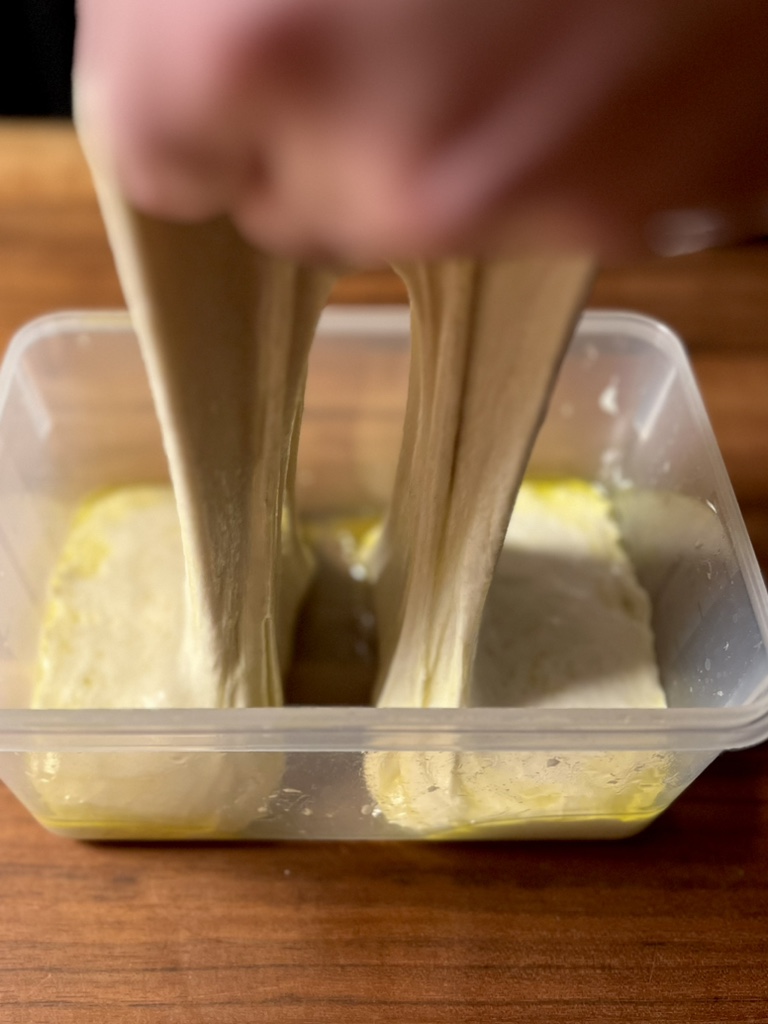

Here we have found a very instructive video on processing such doughs. Not particularly fancy, but very informative.
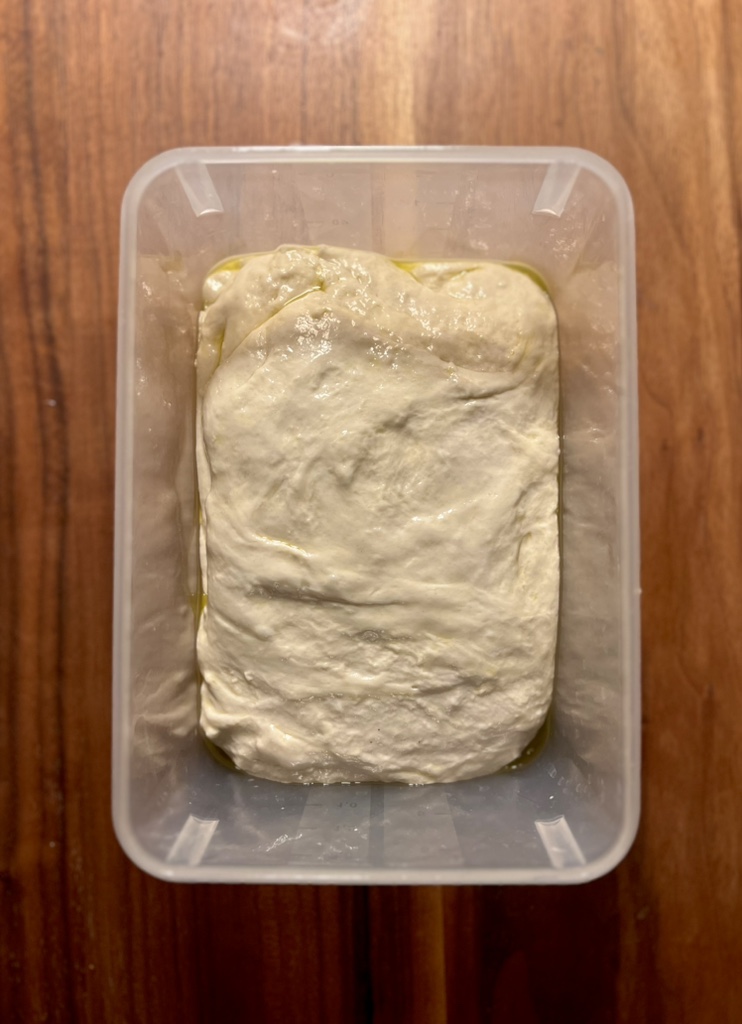
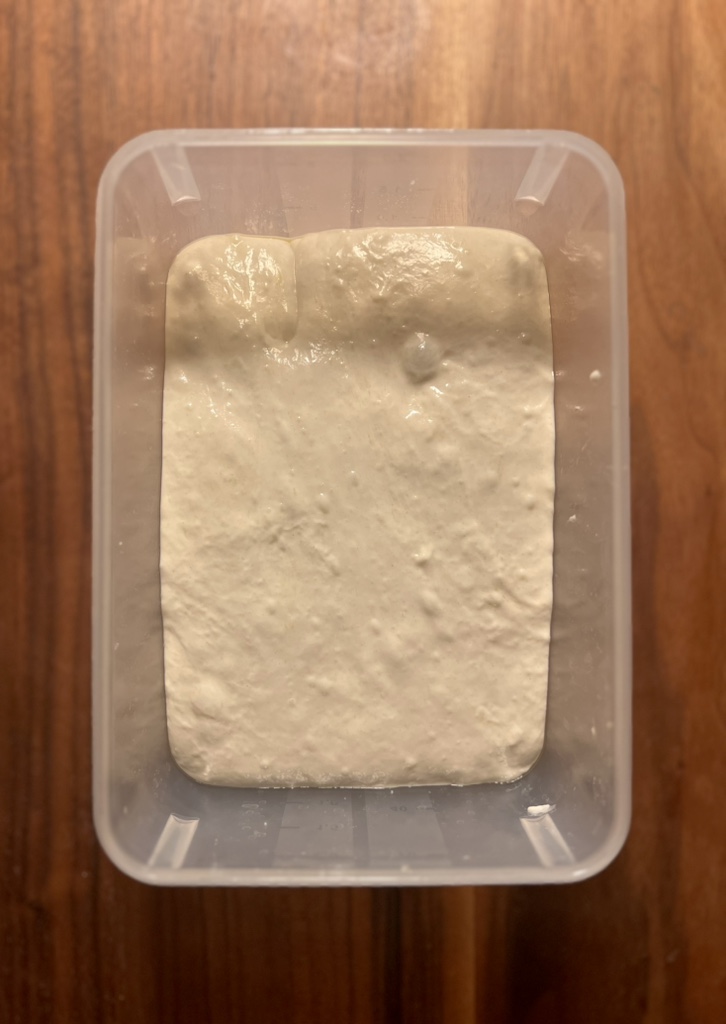
This folding is done a total of four times, always 20 minutes apart and the dough is always covered in between. Do not cut corners, these are essential steps.
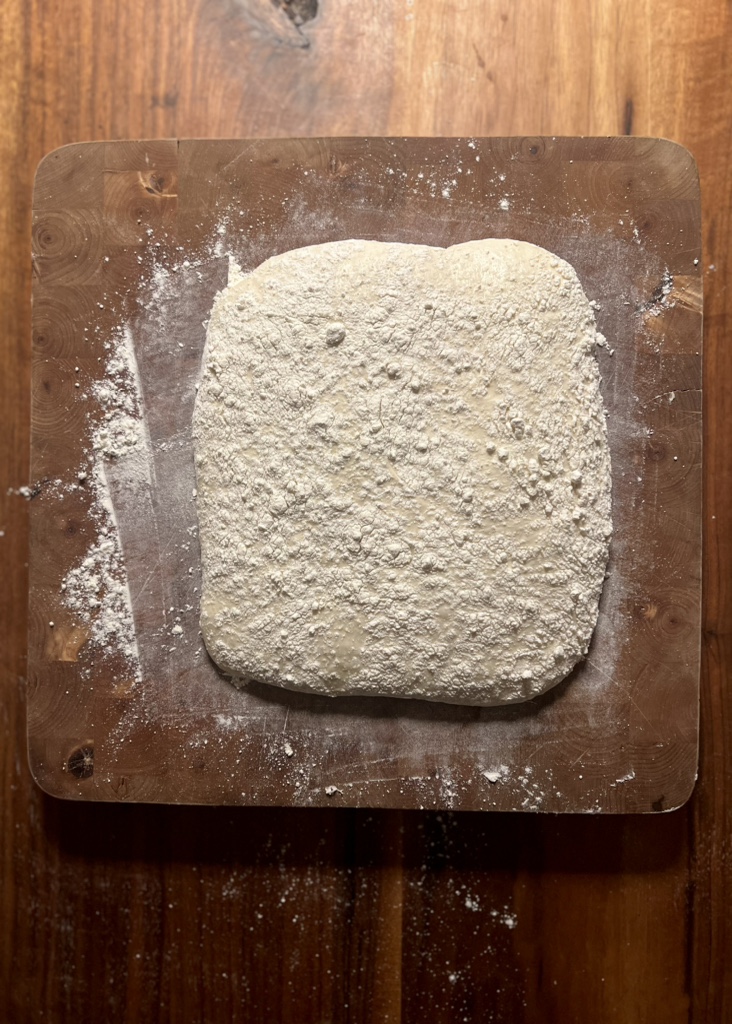
After the last folding, the dough is left to rise, covered again of course, for about 80 – 90 minutes. Then it looks like this:
The surface is very generously dusted with flour. Then use a dough card to loosen the dough from the edge of the mould all around…
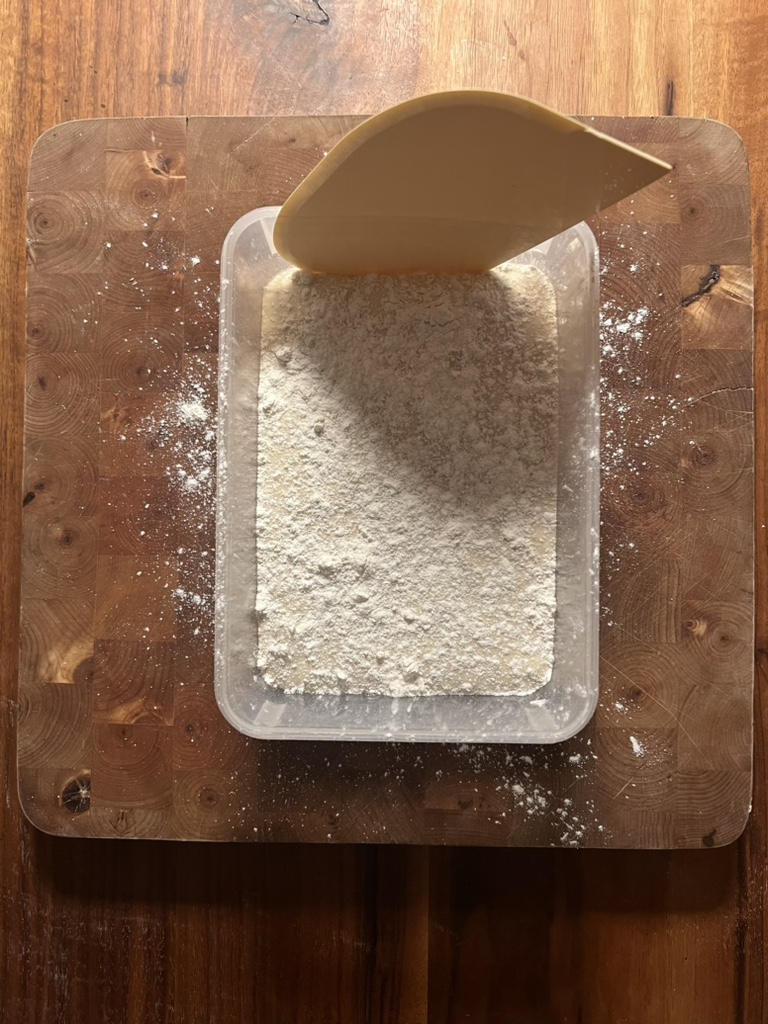
…and turn it out very carefully onto a work surface. From now on, always handle the dough very gently so as not to squeeze the air out of it.
Flour the top very generously and use the dough card to gently shape the dough a little if it should have come apart in any places.
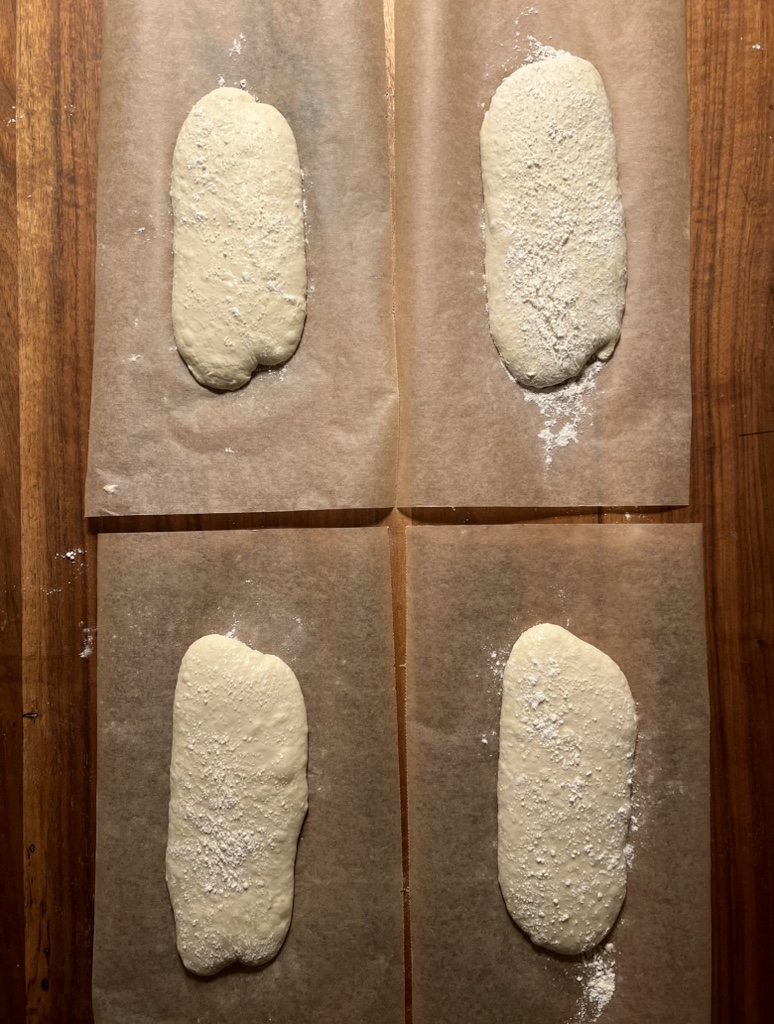
Then divide the dough into four roughly equal parts, first in one direction and then in the other, using the dough card. Cut through the dough with the dough card and gently push the separated parts apart at the same time until they are no longer in contact.

Two baking papers are cut in half, then one piece of dough is placed on each paper. The dough is very, very soft, so grab a piece from the long side with both hands without squeezing it too much, lift it up boldly and then place it gently on the paper. If the piece of dough deforms a little in the process, this is only a good thing, because we are doing handicraft here and this should be visible in the bread, it will only be more beautiful as a result.
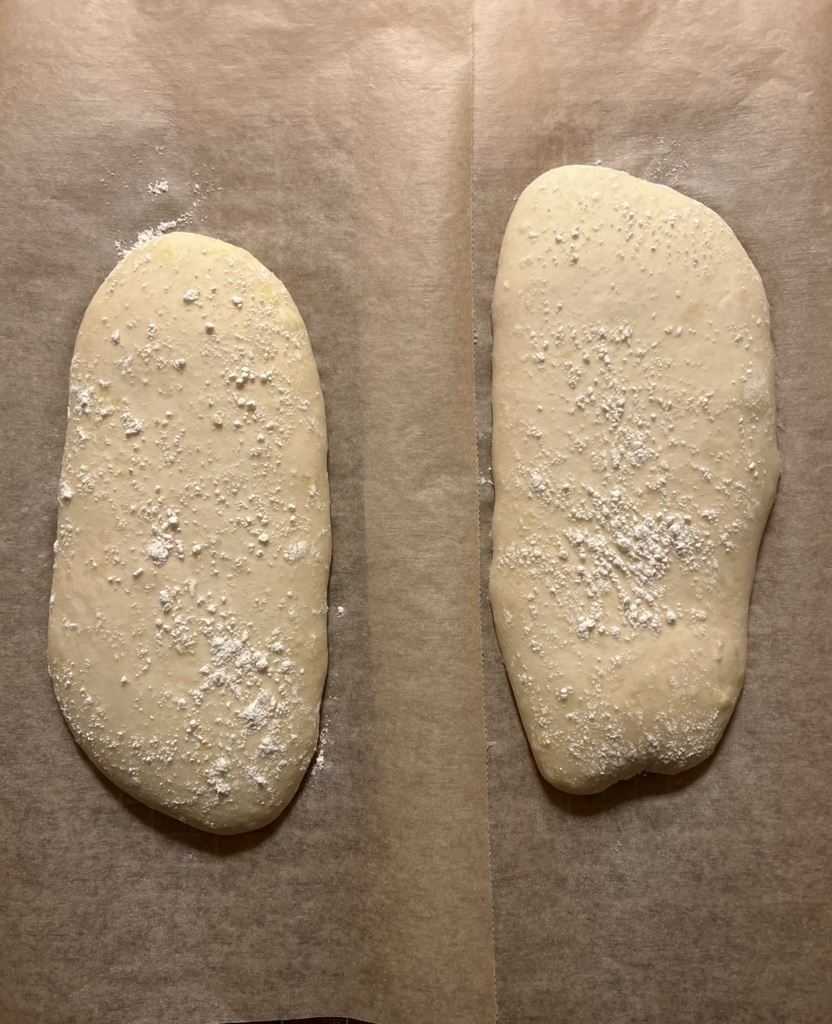
Now the dough is left to rise for at least another two hours, without covering it.
During this time, the dough should only expand slightly and, above all, form visible air bubbles. Depending on your room temperature, this may take a little longer.
The oven is heated to maximum power with convection, which is often around 250 degrees Celsius. Place an upturned baking tray on the middle shelf and place an ovenproof pan or dish on the base.
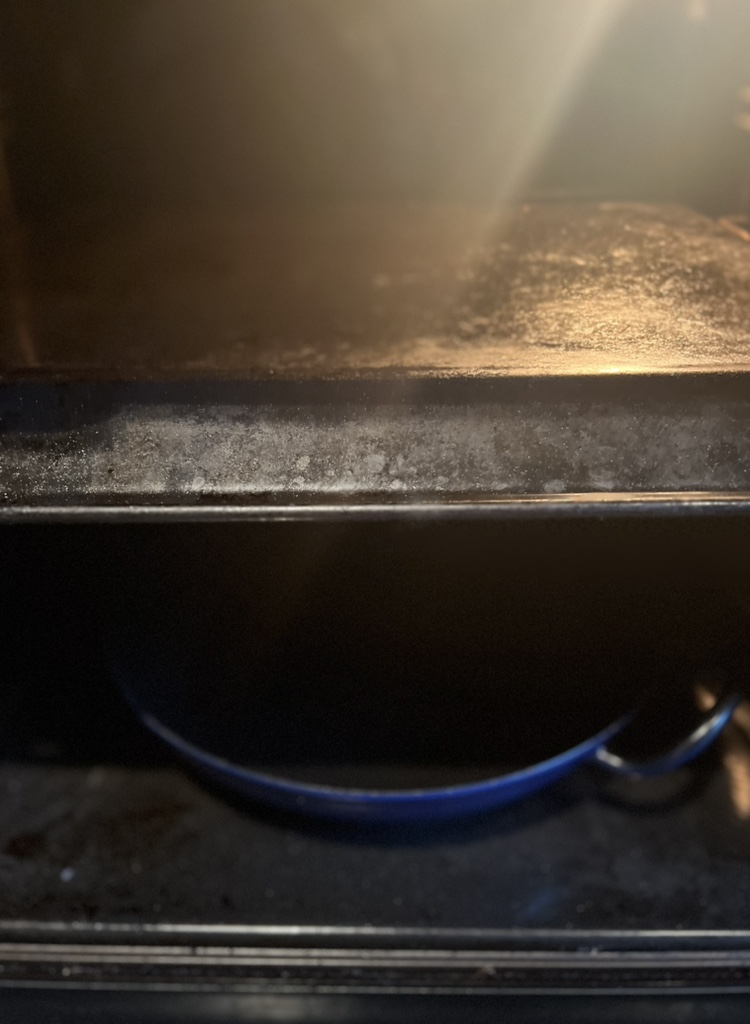
Then carefully pull one loaf at a time together with the baking paper onto a small board or plate and slide it onto the inverted, hot baking tray. We only ever bake two loaves at a time, but you can also bake all four at once in a domestic oven, but then you may have to cut off some of the baking paper.
Pour a glass of water (approx. 200 ml) into the hot pan at the bottom of the oven and then close it. Bake the loaves in the resulting steam for 15 minutes, during which time they will rise beautifully.
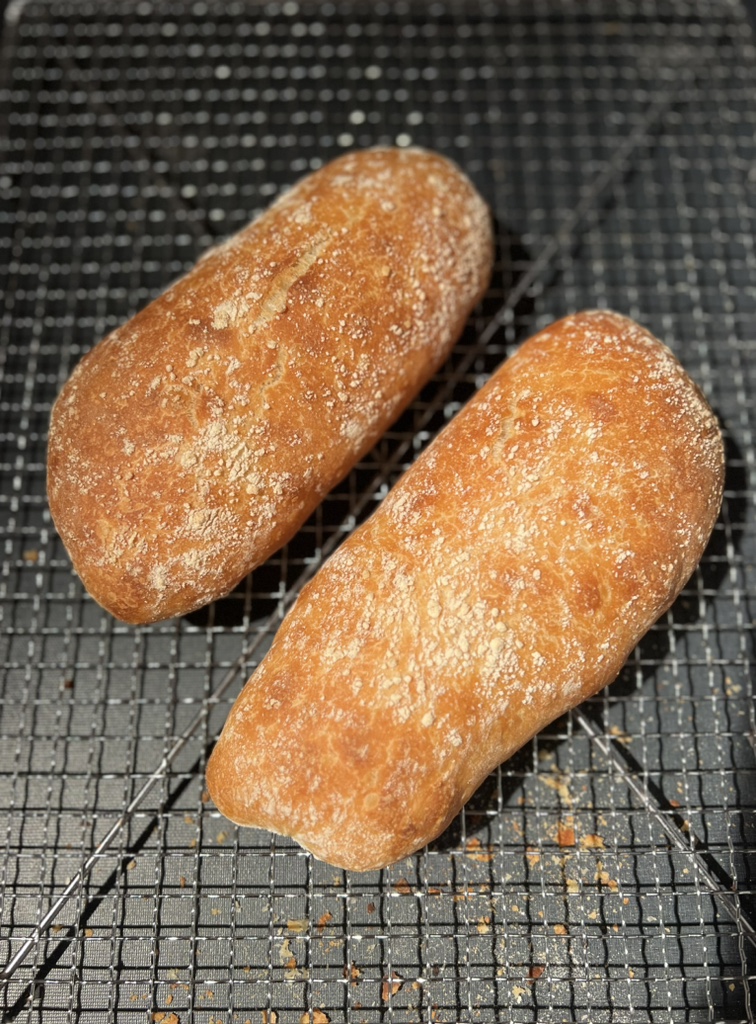
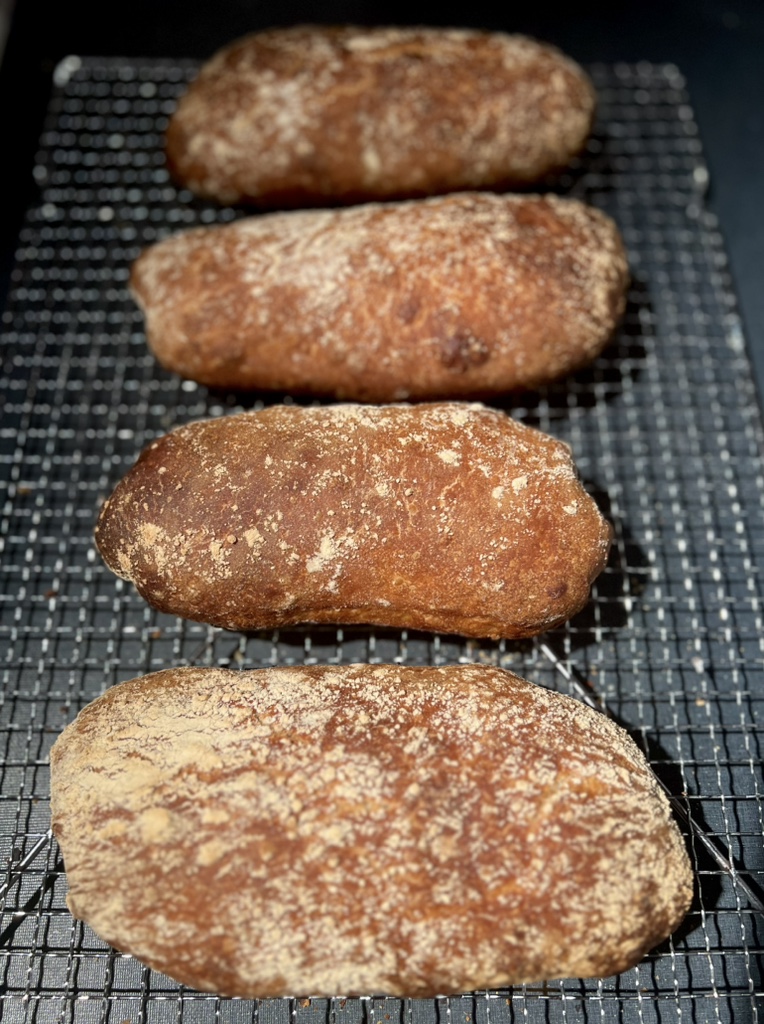
The paper is removed and the loaves are baked on a baking rack in the upper part of the oven for a further 10 – 12 minutes. Keep an eye on the colour, they will brown quickly.
Then place the loaves on a rack to cool completely.
The cooled bread can be wrapped in a cloth and kept for one to two days, after which it will lose its texture and flavour. Of course, it tastes best fresh. It can also be reheated in the oven or sliced and toasted in the toaster.
For a classic Spanish preparation, toasted, large slices are rubbed with a halved clove of garlic and then with a halved tomato. Add a little salt and a few drops of the best olive oil – done!
Enjoy.
And may the taste be with you.
Ingredients (for 4 small loaves):
500 g very strong wheat flour (Manitoba, pannettone flour, type 550 – a high protein content of at least 11 % is important) plus flour for dusting
490 ml water
10 g salt
3.5 g dry yeast
20 g olive oil