Anyone buying a bottle of Sriracha today is most likely purchasing a product from one of the three largest manufacturers: Sriraja Panich and Flying Goose from Thailand, and Huy Fong Foods from California. The original – the sauce that gave the style its name – comes from Si Racha, a port city on the east coast of the Gulf of Thailand, around 100 kilometres south-east of Bangkok.
The Thai name for the town is ศรีราชา, which is romanised as Si Racha in the ‘Royal Thai Transcription System’. However, Thai people themselves pronounce it more like a soft ‘Sr’. When the sauce became internationally famous, the spelling Sriracha came into use. Once it has been printed on millions of bottles, there is no going back.
In Si Racha, in the 1930s, the cook Thanom Chakkapak began making a hot chilli sauce for her own use, which she later sold to local restaurants and began bottling commercially in 1949 under the name Sriraja Panich. The sauce was fruitier and milder than many other Thai chilli pastes, making it a versatile condiment for fish and seafood. In Thailand itself, Sriraja Panich is still regarded as the benchmark today.
David Tran, a Vietnamese refugee of Chinese descent, arrived in the US in 1979 and began making chilli sauce in Los Angeles using his own recipe. He named his company Huy Fong Foods, after the cargo ship that had brought him from Vietnam, and his sauce featured a rooster on the bottle, which you’ve probably seen before. This version is thicker and significantly sweeter than its Thai counterpart – and it first conquered America and then large parts of the world.
Flying Goose was founded in Thailand in 1999. The sauce is based on an original recipe from the Si Racha region and uses chillies grown on Thai farms. In terms of flavour, Flying Goose is closer to the Thai original: slightly less sweet than Huy Fong, less garlicky and fruitier.
Sriracha sauce is made from chillies, garlic, salt, vinegar and sugar. But if you take a look at the ingredients list on any of these products, you’ll find a load of other stuff in there too. And if you don’t want to eat that, you can simply make your own Sriracha 😉. The same goes for ketchup, by the way.
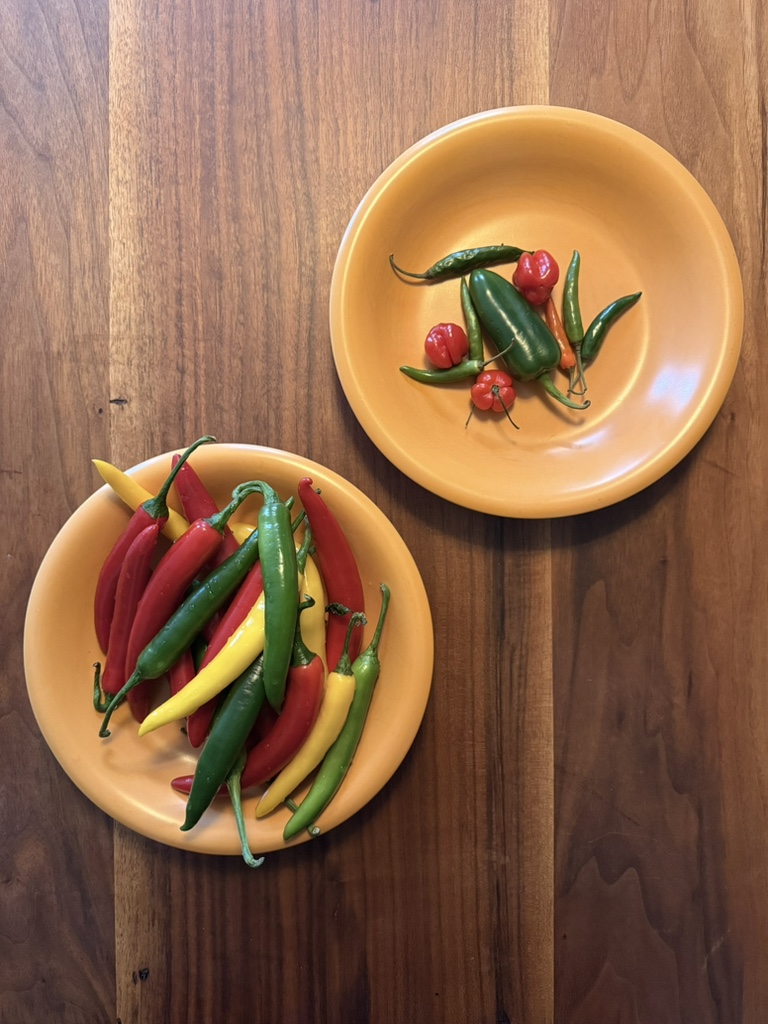
It all depends on the chillies, of course, and you’re limited to whatever’s available. In Thailand, two main varieties are used, both of which are red: the larger Phrik Chi Fa (‘chilli pointing to the sky’), which serves as a milder, fruity base, and the small Phrik Khi Nu (‘mouse droppings chilli’). The latter is known internationally as bird’s eye chilli. Basically, a mixture of different varieties is important because you want to combine aroma, fruitiness and heat according to your personal taste. The colour of the chilli is less important, even though every Sriracha in the shop is red. Ours will be too, even though we don’t use only red chillies.
We use various varieties available in Europe that are very similar to the large Thai chilli and offer a relatively mild heat of 1,000 – 5,000 Scoville units. Red Fresno chillies are also very suitable, although they are hotter.
To give it a bit of a kick, we use a mix, depending on availability: Thai bird’s eye chillies, Mexican serrano chillies (10,000 – 23,000 Scoville units) and – just a little! – habanero. With 100,000 – 350,000 Scoville units, these are to be taken very seriously, but they add a fantastic flavour. You just have to be careful not to overdo it.
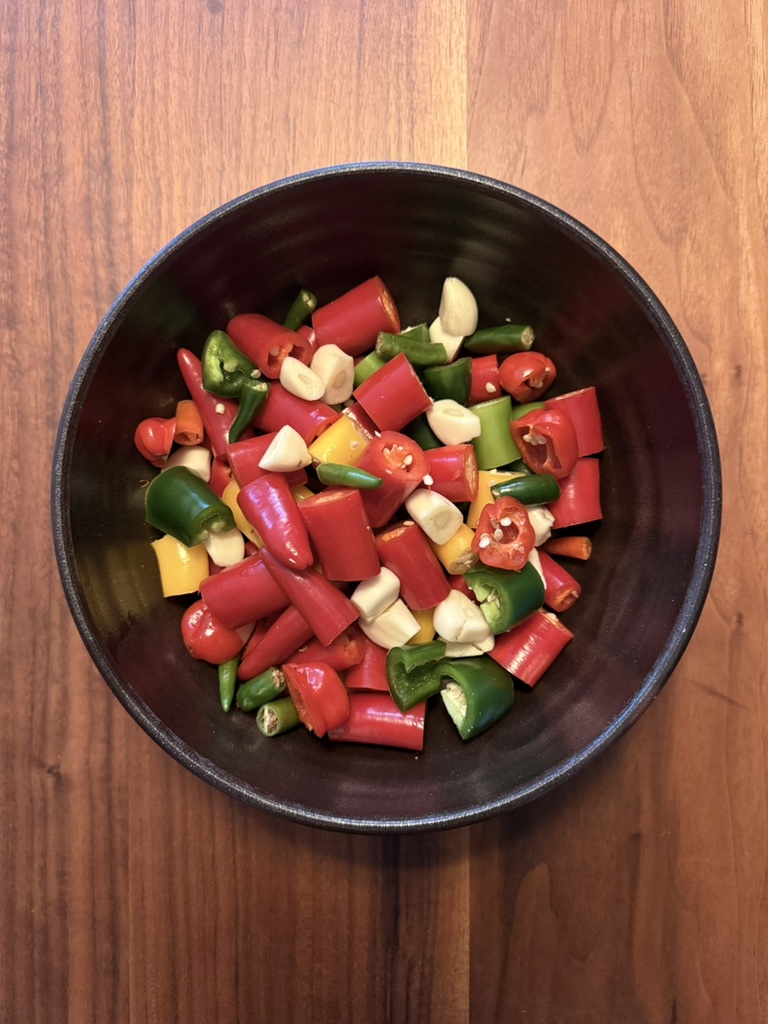
The other ingredients are garlic and salt. Here, you can choose between a subtle hint or a more pronounced flavour – as always, you’ll find suggested quantities at the end of this recipe. There are variations that use roasted garlic, but we’re sticking strictly to the basics.
Cut the stalks off the washed chillies; chop the rest into rough pieces, including the seeds. Peel the garlic cloves and chop them roughly as well. Weigh out the salt precisely and sprinkle it over the mixture.
You could crush it all in a mortar, but that not only takes a long time, it also stings. For the mucous membranes, this is a completely different challenge to chopping onions. So we process everything in stages using our food processor – in this case, the small but powerful Moulinette. It doesn’t need to be too fine, but it should release some liquid. The aim is a wet, not just damp, paste. But it will be a paste, and won’t look like a sauce just yet.
The next step is a short lactic fermentation lasting just a few days, during which the lactic acid bacteria naturally present on the chillies are allowed to work in the absence of oxygen and with the addition of salt. They break down sugars, produce lactic acid and CO₂, and in doing so transform the raw heat of the chillies into something more rounded and complex. Without fermentation, it wouldn’t be Sriracha, but a different kind of ‘hot sauce’. Note to ourselves: we need to explain that as well.
You will need a jar with a lid that does not seal completely. There are products designed specifically for fermentation, but we use a simple, thick-walled preserving jar. To kill any bacteria, boil it for 10 minutes in a pot of water or place it in the oven at 130 degrees Celsius for 15 minutes. After that, do not touch the inside of the jar.
Once it has cooled down, pour the chilli, garlic and salt mixture into the jar, making sure it’s as neat as possible, and press it down with a pestle or spoon to remove any air pockets. To ensure the mixture ferments but doesn’t go mouldy, the surface needs to be covered with liquid as much as possible. You don’t want anything sticking to the inside of the jar above that.
If your chillies haven’t released enough liquid, add a little salt water (also at a concentration of 2.5%, of course). The jar should then be covered with a loose-fitting lid – CO₂ needs to be able to escape, but fruit flies should be kept out.
Direct sunlight should now be avoided. The ideal ambient temperature is 18 – 24°C. Below this, fermentation slows down; above this, it becomes more uncontrolled and the risk of mould increases. So any corner of your kitchen away from the window will do.
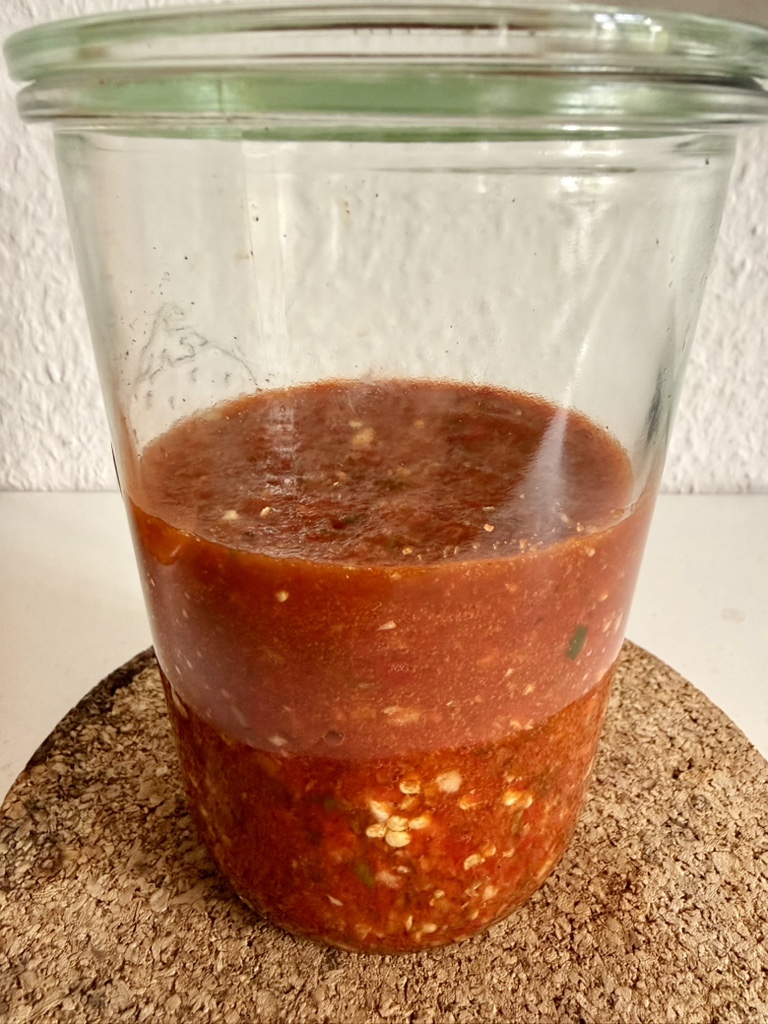
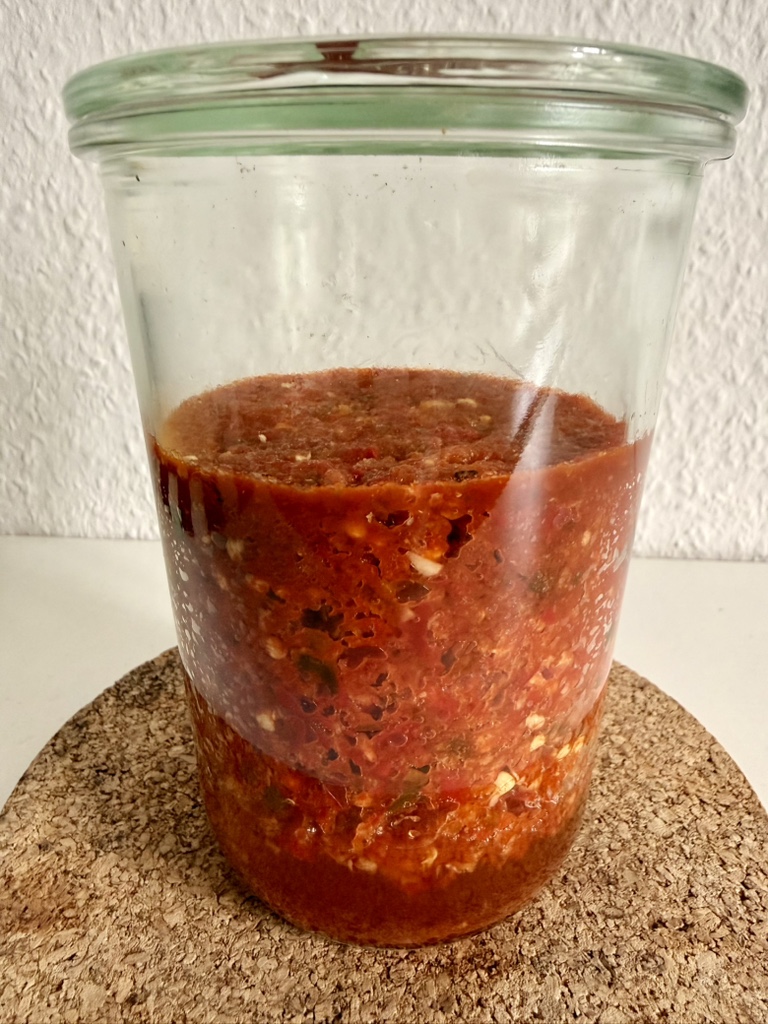
After five to seven days (it’s a matter of personal preference, so you’ll just have to try it out for yourselves), quite a lot has happened here. Liquid at the bottom, solids rising to the top, air bubbles – that’s exactly how it should be.
Now it’s time to add light vinegar and sugar; rice vinegar and palm sugar would be the most typical choice. This brings the fermentation process to an end and adds the necessary depth of flavour; here, too, the similarity to ketchup is obvious. There are recipes in which the sugar is added before fermentation, partly because it is supposed to promote it. That is true, but it makes the process more active and riskier. If you allow 5 – 7 days, you do not need to add sugar.
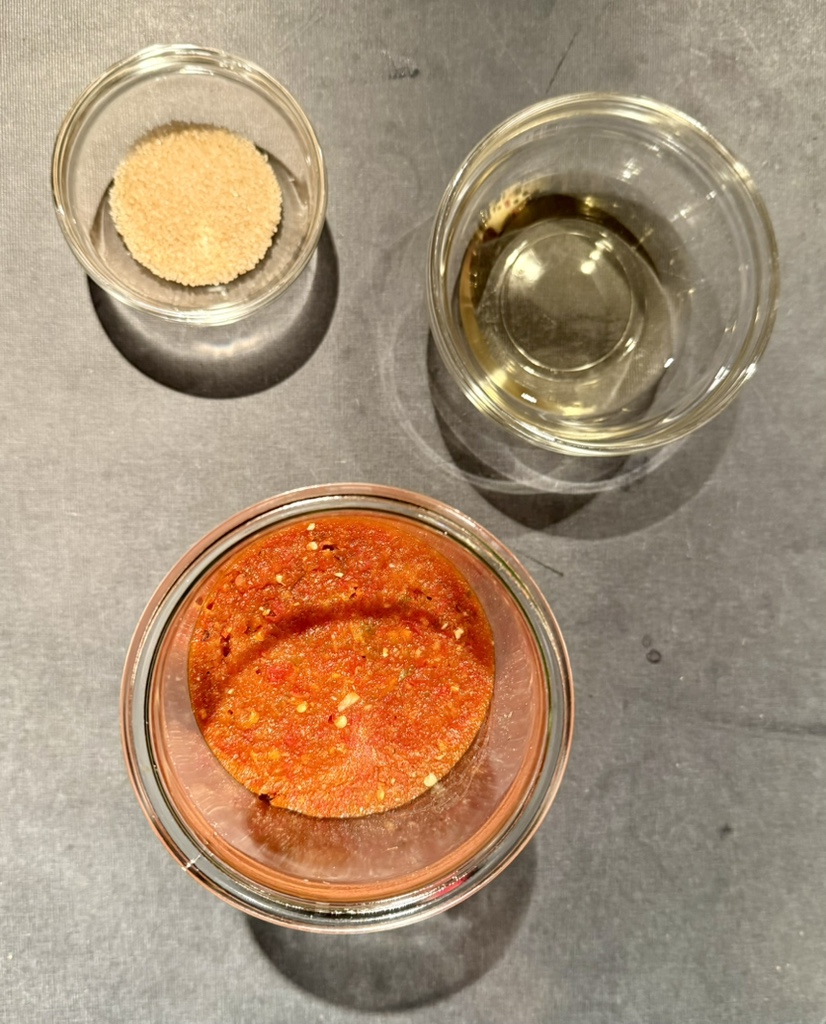
Add everything to the chilli in the jar and purée thoroughly using a hand blender. Then pass the mixture through a fine sieve into a saucepan.
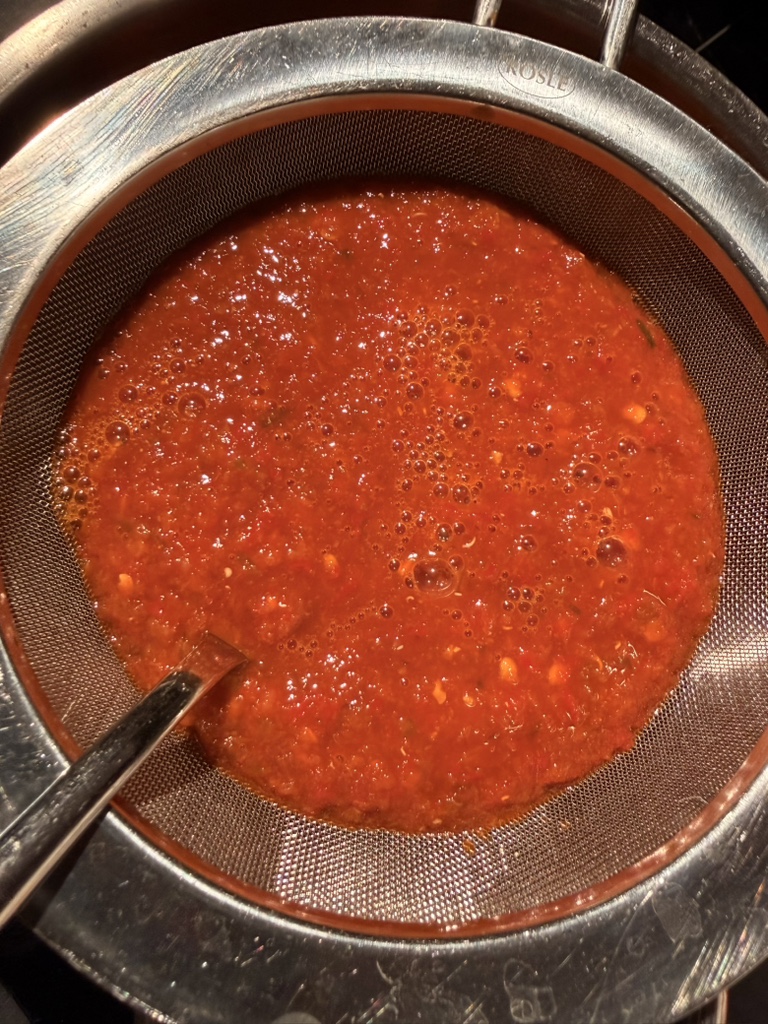
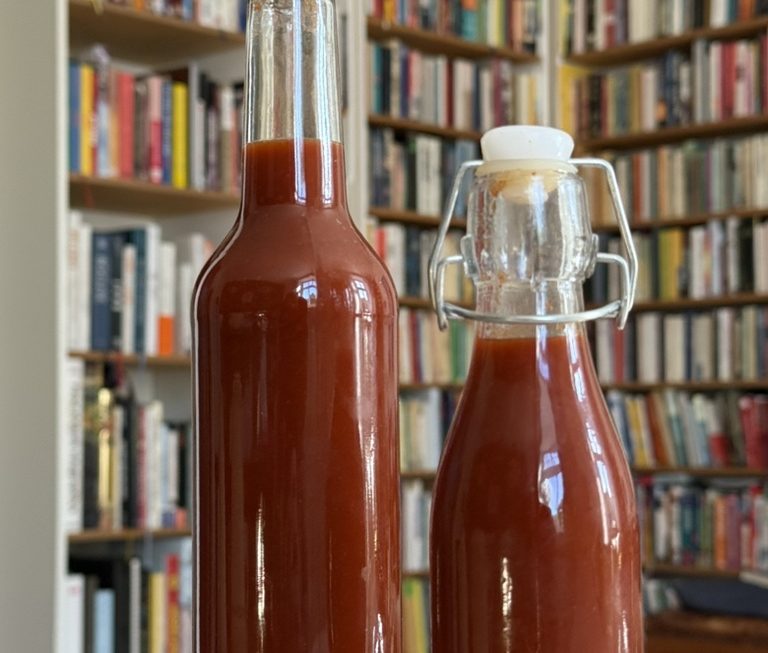
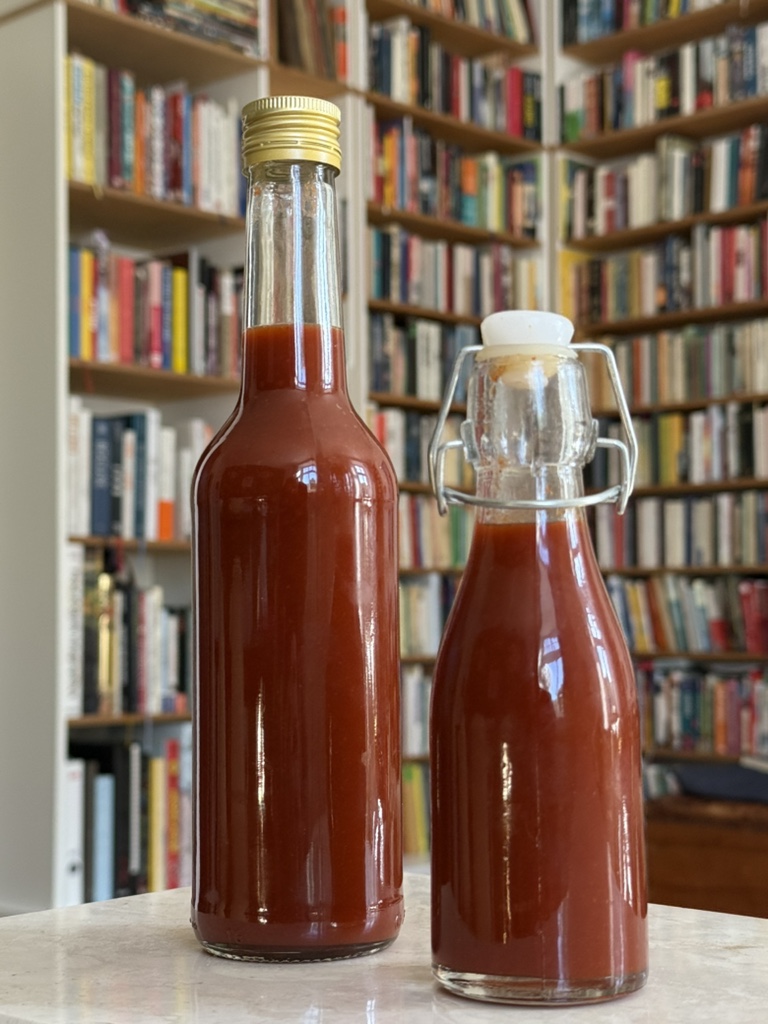
The sauce is boiled for 5 minutes, which kills off any harmful bacteria that may be present. It is then poured into the prepared jars whilst still hot.

The result is a sauce that is spicy without being overpowering, fruity without being too sweet, has a highly complex flavour, and can easily be kept for months without the need for the additives commonly used in the food industry.
Enjoy.
And may the taste be with you.
Ingredients (for approx. 300 ml):
500 g red chillies, mixed: e.g. Fresno and large Thai chillies as a base, bird’s eye chillies and habaneros for heat and flavour – if using habaneros, use sparingly
(we use around 420 g of milder varieties and 80 g of hotter varieties here)
6 – 8 garlic cloves
14 g salt (approx. 2.5% of the total weight)
3 – 4 tbsp light, neutral vinegar (rice vinegar)
1 – 2 tbsp sugar (palm sugar or brown sugar)